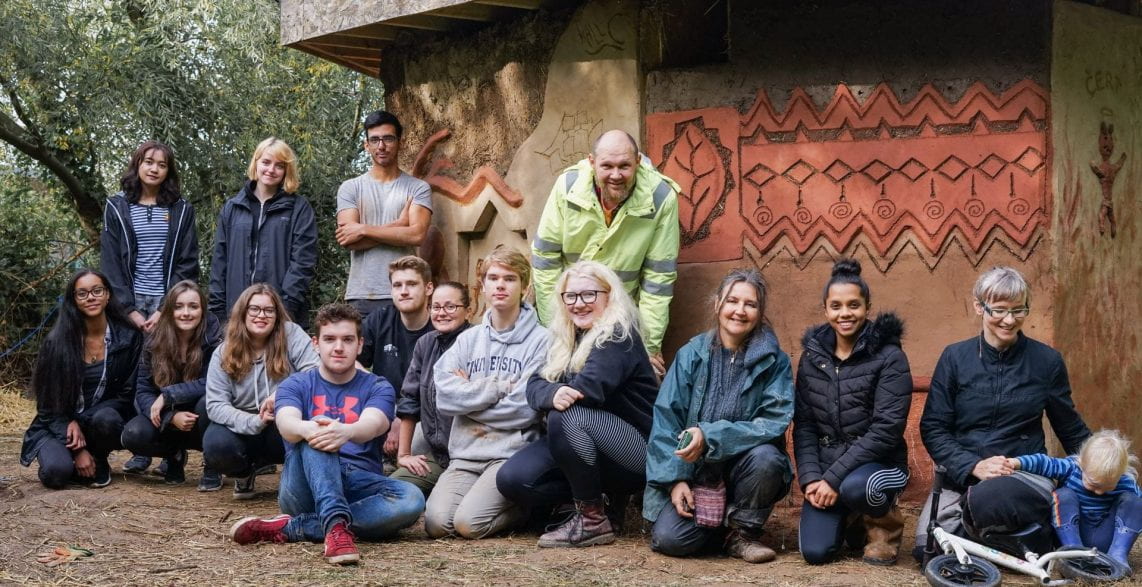
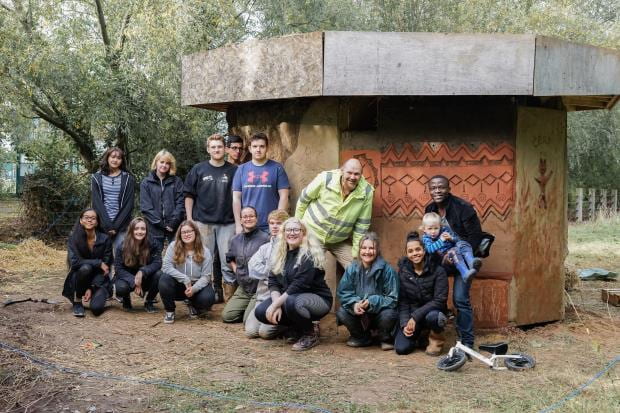
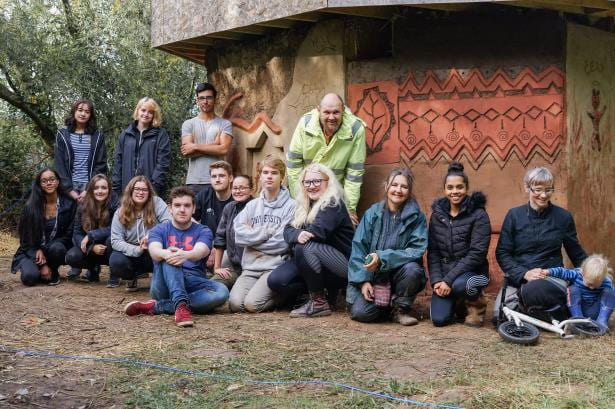
The ‘Hexagonium’ 2019 workshop took place on the University campus in Lincoln between 8 to 12 October 2019. It was a continuation of Hexagonium 2016-17 Workshop.
This time it was run in collaboration between UoL and Paulina Wojciechowska (Earth Hands and Houses) with a great help of EMESS.
The ‘Hexagonium’ constructed in 2016 on the University campus. each of the 6 walls of the building was built using a different construction method. (read Hexagonium 2016). The Hexagonium served as a base for several experiments and research. Unfortunately, since the construction, it was vandalised and was at risk of demolition.
Thanks to the University Teaching & Learning Innovation Fund It was it possible to renovate the building whilst focusing on the artistic value and education benefits for students of Lincoln School of Architecture and the Built Environment LSABE. (East Midlands Earth Structure Society).
https://uol.cloud.panopto.eu/Panopto/Pages/Viewer.aspx?id=20b4b86d-7836-4b45-a3a9-abc600e6b667
https://uol.cloud.panopto.eu/Panopto/Pages/Viewer.aspx?id=20b4b86d-7836-4b45-a3a9-abc600e6b667
https://uol.cloud.panopto.eu/Panopto/Pages/Viewer.aspx?id=20b4b86d-7836-4b45-a3a9-abc600e6b667
DAY 1 Tuesday 8th
Workshop commenced on a Tuesday morning under a clear and favourable weather. About 30 students from the School of Architecture and Design at the University of Lincoln participated in the workshop. They worked in groups to make sure everyone partly contributes to every stage of the development of this workshop. It was a good practical learning exercise for the students

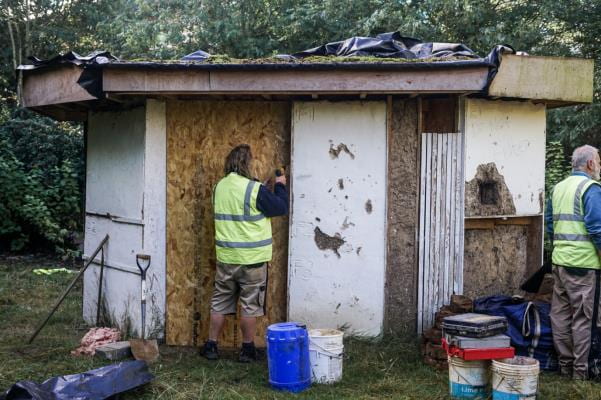
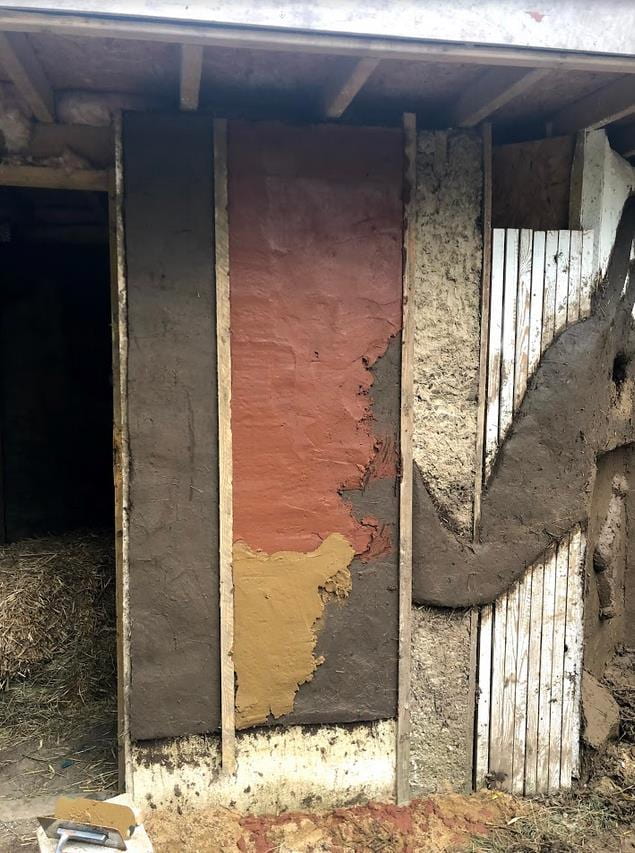
The existing shed which is going to be refurbished by students is a hexagon. This means there are 6 different wall panels. The students involved were divided into 6 groups with each group focused on sorting out the problem of their panel and finding a way to refurbish it efficiently. There are a few natural materials available on-site namely: strawbale, mud, earth, wood panels. The primary mixture used at the early stages of this workshop is a stiff mixture of strawbale, mud, earth and water. The next layer of mixture that was used was more of a pigment mixture. It included the following:

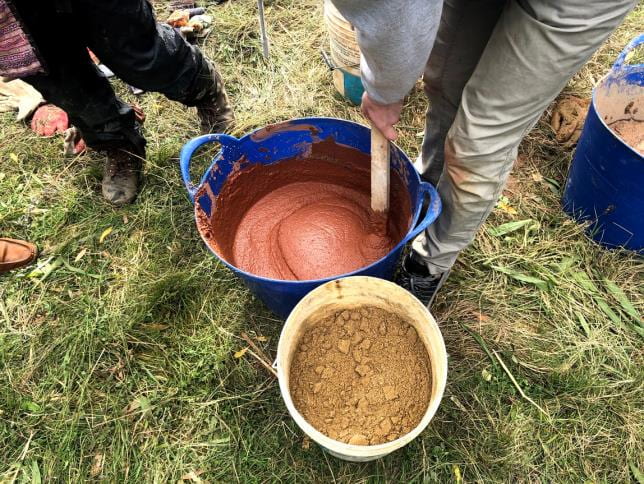
- ● One proportion of fine sieve earth
- ● One proportion of fine sand
- ● Red Pigment
- ● A little bit of wheat paste (hot water + flour) which used to be the old fashioned way of making glue.
9.30 – 12.30 Morning session
- Cleaning Organising site,
- Unloading tools, Getting water, opening the building,
- Bringing earth material (Earth Blocks from the Castle Ground)
- Sieve the earth trough sieves ( coarse sieve)
12.30.-4.30
- Straw clay plaster p
- smoothing whole in the walls sculpting patters
- Filling the holes
5.00- 6.30
One hour Lecture and talks ‘Lincolnshire Vernacular Architecture’ by Trevor Oliver Chairman of EMESS (East Midlands Earth Structure Society)
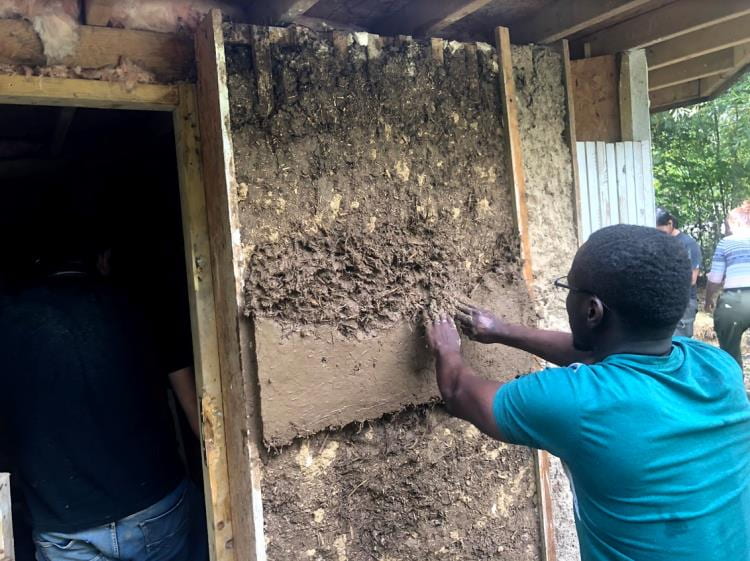
GROUP A DAY ONE: This group commenced work on site immediately after a brief introduction. The refurbishment they need to do is straightforward. They chipped away the existing plaster that was damaged to apply a mixture of straw bale, mud, earth and water. A stiff mixture of these materials was then slapped on the wall and properly smoothed using a wooden float. The tricky bit at this stage was making the mixed materials stick together on the wall. They added a little bit of detail on the edges of the plaster to make it look beautiful.
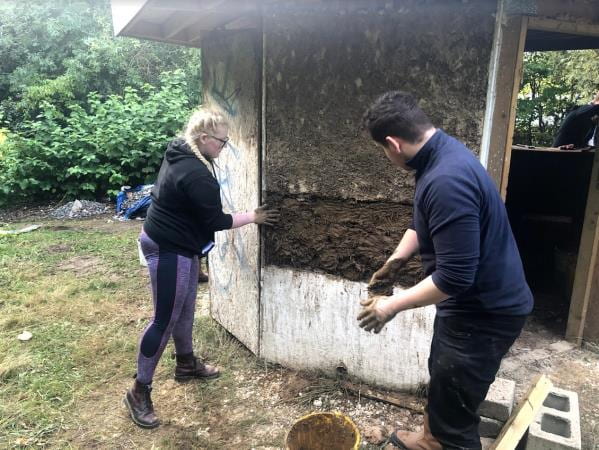
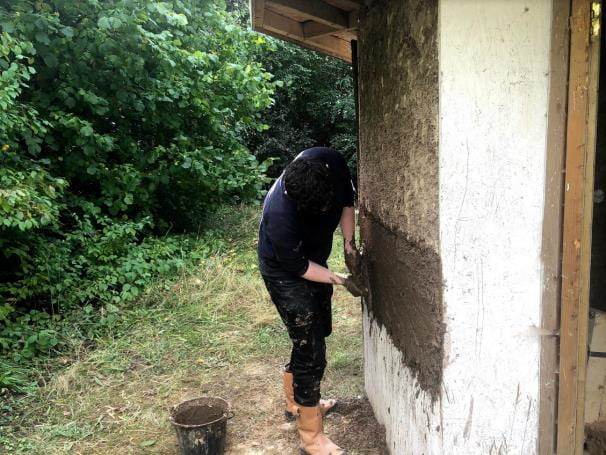
Figure 1: Members of Group A applying the mixture on the wall.
Figure 2: A student smoothing the mixture with a wooden float.
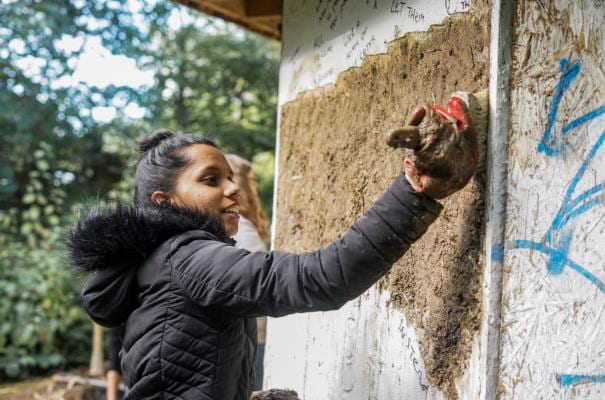
GROUP B DAY ONE: The renovation on their panel is quite straightforward. They scraped away the existing plaster that was damaged to apply a mixture of strawbale, mud, earth and water. A stiff mixture of these materials was then applied on the wall and properly smoothed using a wooden float. The tricky bit at this stage for them as well as making the mixed materials stick together on the wall. So the solution was to wet the dry clay beforehand with a brush and water then apply the mixture on the wet surface. This made it easier for the students. They also added a little bit of detail on the edges of the plaster to make it look precise and beautiful.

GROUP C DAY ONE: The renovation of this group’s panel was a bit tricky. The tricky bit at this stage for them was the wall already had a massive hole in the middle that they had to carefully fill. So just applying the mixture onto the whole was not enough. They had to find another solution which was to put sticks at the edges (meeting point of the existing plaster and new mixture) of the hole to help support the mixture they are applying. Sticks used as support on the edges of the hole made it beautiful, it was a good experiment by the members of this group. A key observation was also made by the members of this group that the short straws were better than the long straws.
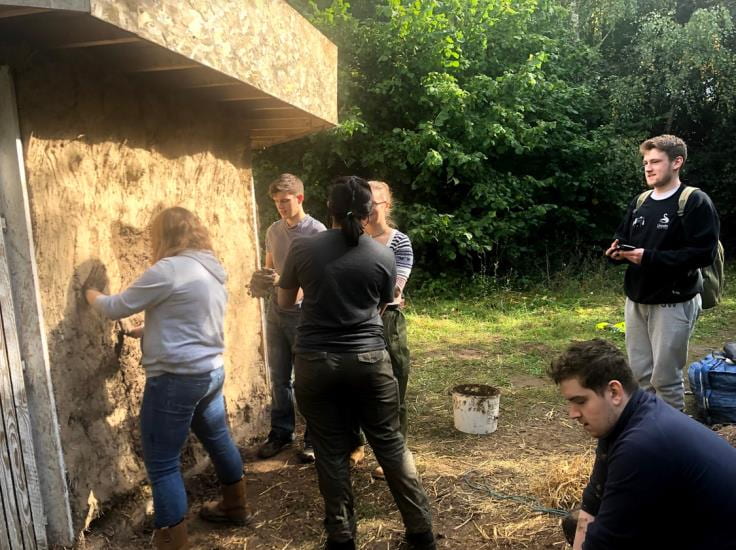
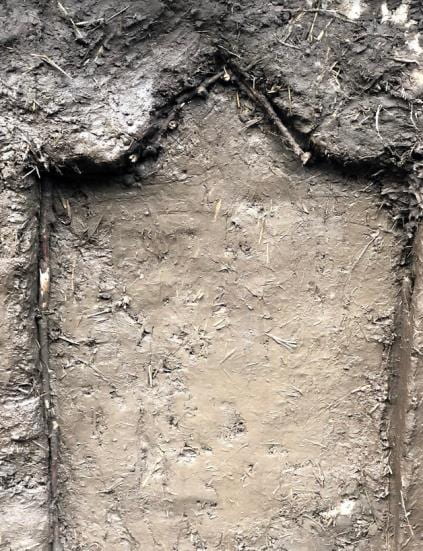
Figure 12: It shows the sticks used on the edges of the massive hole for support.
Figure 13: Members of group C applying the mixture to fill the hole on their panel.
GROUP D DAY ONE: The refurbishment on this panel was different from the rest. It was a window opening and a bit of the wall that needed renovation. They started by removing the window cover which was a bug plywood. Next step was to even out the clay at the bottom of the window where the lintel is located. Window opening was then supported with a woodcut from the workshop to the exact size of the opening. They also added plywood on the edges to make the frame. In addition, an existing timber frame wall on the same panel was filled in with the mixture before doing the frame. One unique thing done on this panel was to slope the mixture on the window to avoid rainwater from entering the building. They added a little bit of detail on the edges of the plaster to make it look beautiful.
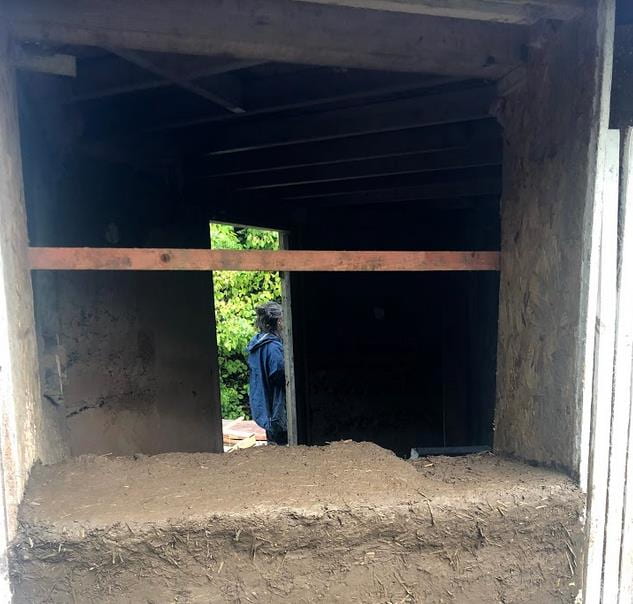
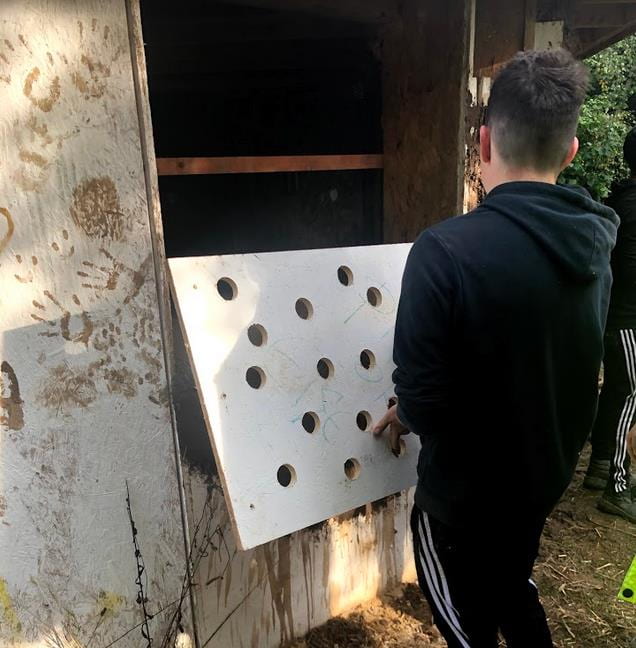
Figure 18: The sloped mixture to help rainwater move slowly out of the building.
Figure 19: Woodcut from the workshop to perfectly fit into the opening.
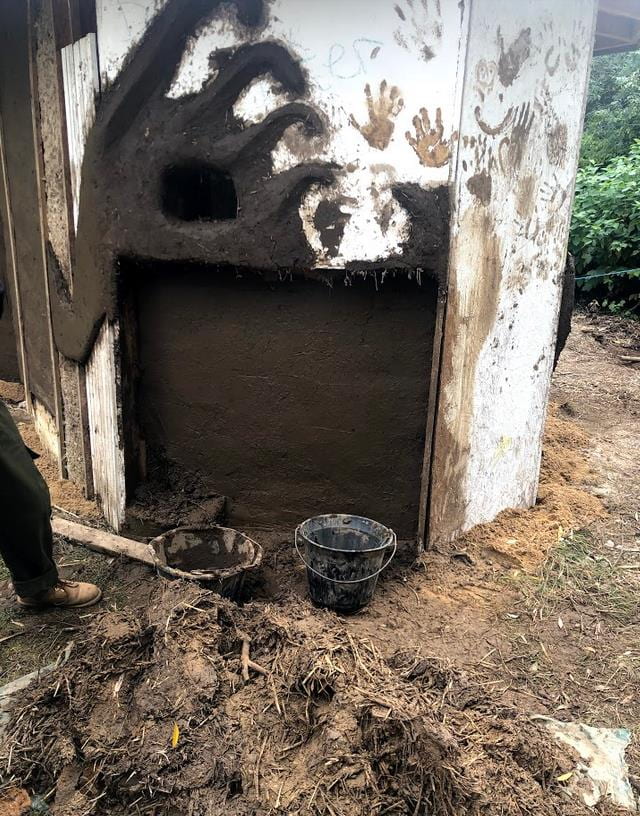
GROUP E DAY ONE: The renovation of this group’s panel was also a tricky bit. There was a massive hole on the panel that needed good support because it carries quite a heavy load of the whole hexagonal shed. They had to use a lot of mixture to fill this hole. Mixture alone was not enough, so mud bricks that were available on site were properly watered and well-positioned on the hole. In addition, wood panels were also added to help build round then for effective support. Because a lot of mixture was needed, a mesh was provided by the team leader to help sieve the mud and earth for easy mixture.
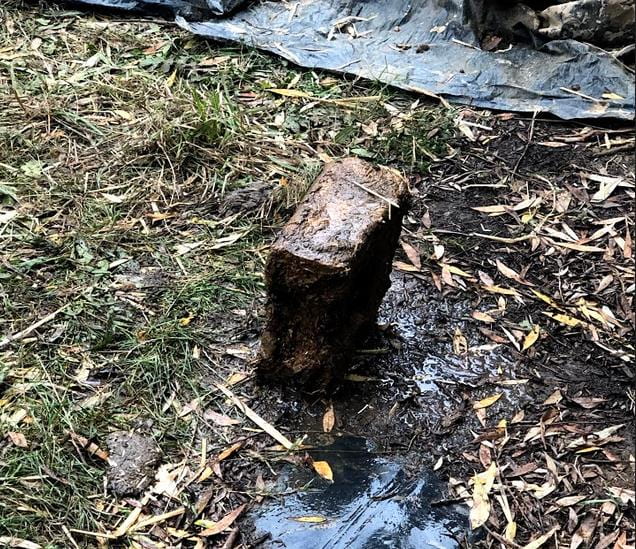
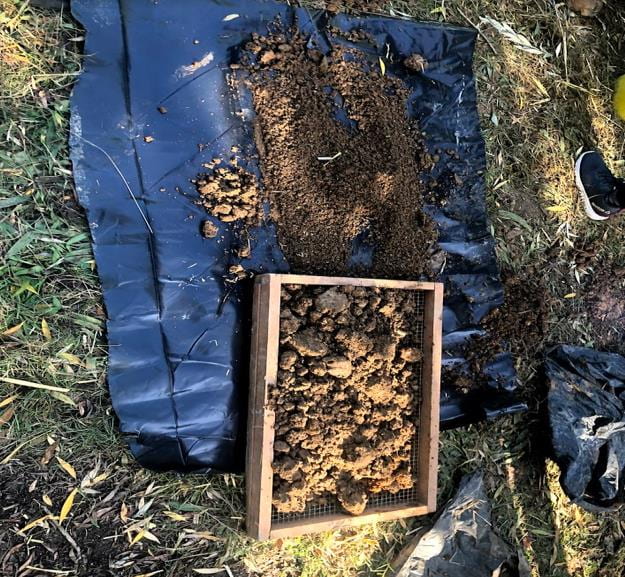


Figure 23: Student carefully fitting in the mud bricks in the wall.
Figure 24: Members of Group E tying some sticks together to help support the wood panels.
Figure 25: One of the mud bricks watered before placed in the wall.
Figure 26: A mesh which was used to sieve the earth.
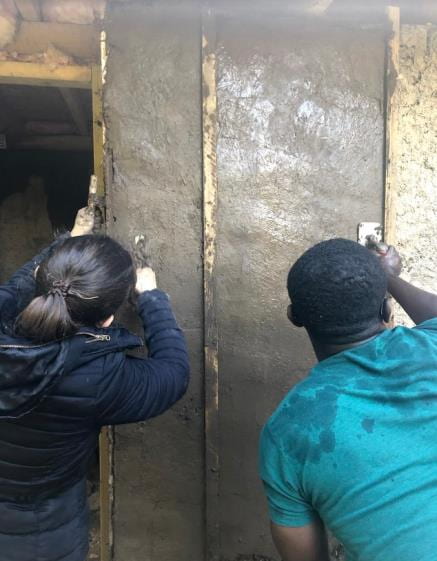
GROUP F DAY ONE: The renovation on their panel is quite straightforward. They scraped away the existing plaster that was damaged to apply a mixture of strawbale, mud, earth and water. A stiff mixture of these materials was then applied on the wall and properly smoothed using a wooden float. The tricky bit at this stage for them was adding a wood panel to separate the wall. They wanted to make two different kinds of finish, from a smooth layer to a layer with texture. They also added a little bit of detail on the edges of the plaster to make it look precise and beautiful.
DAY TWO: Wednesday 9th October
9.00-11.00
Three Lectures by Paulina Wojciechowska
1 (Natural architecture introduction)
2 Strawbale Architecture
3 clay plastering
11.00-12.30
Chopped straw plastering
RESEARCH GROUP:
First Research group reaching Straw architecture
12.30- 4,30
Sieving preparing fine plaster for next day
GROUP A DAY ONE: The second day of the workshop was a continuation of day one. More mixtures were made to be applied on the remaining panels. The tricky bit in today’s work was slapping the mixture onto a wallboard that does not have plaster on it to help it stick together. It had to be carefully done to make sure it sticks to the wallboard. The standout observation made in this group today was the edges can be done smoothly using two metal floats.
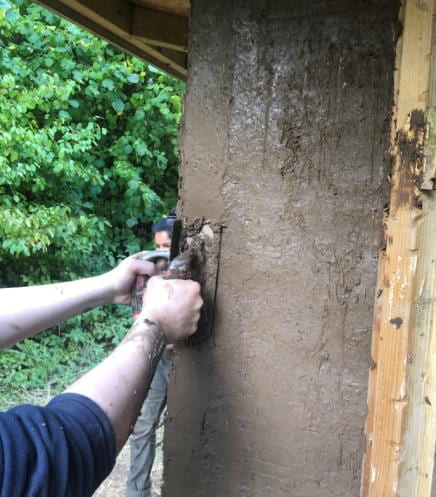
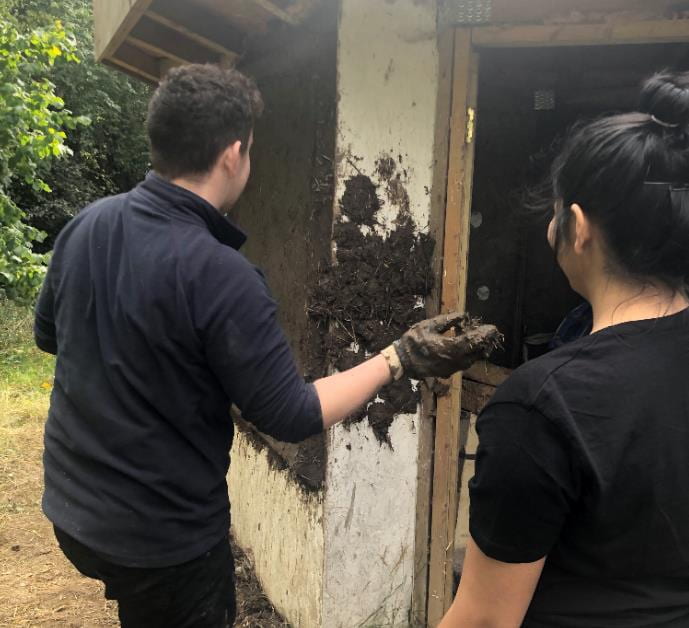
Figure 3: Putting mixture on another side of the panel which is made up of wallboard.
Figure 4: Cleverly smoothing the edges of the wall.
GROUP B DAY 2: This group’s work is straightforward. So they just continued there work by making more mixtures, applying and smoothing everything. They did not find any challenges.
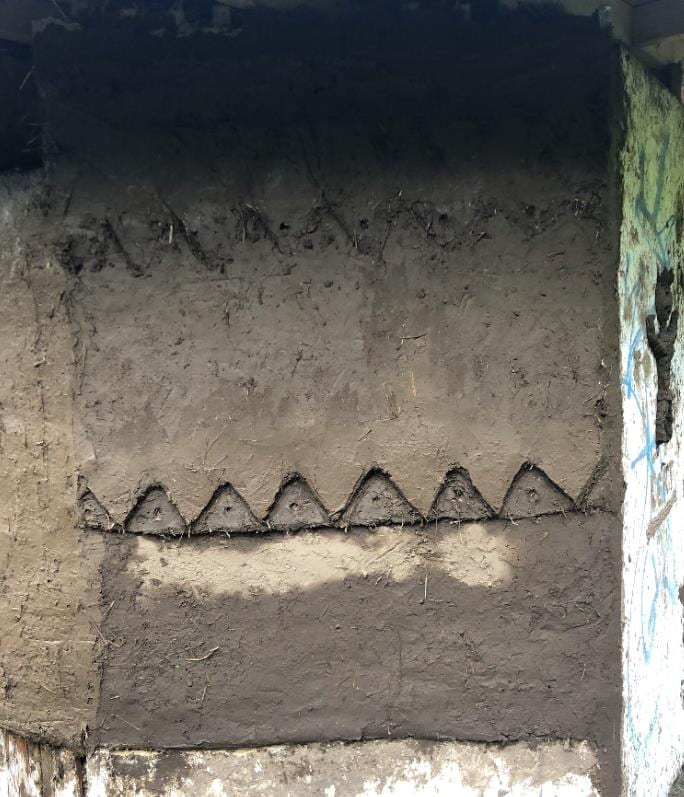
Figure 9: The group B panel is almost done.
GROUP C DAY TWO: They had a little left to do from day one. The group focused on checking the soil to remove stones and make more mixtures for the bit left. They also worked on their edges and made them fine and nice looking.
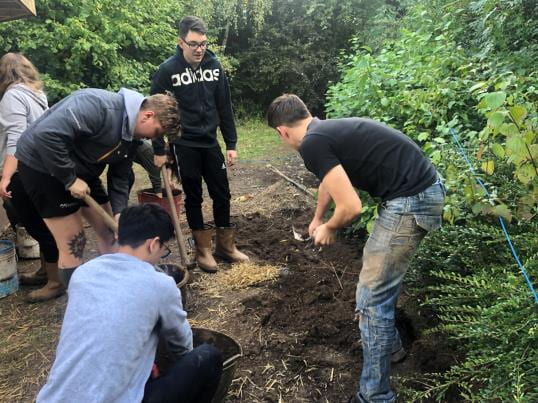
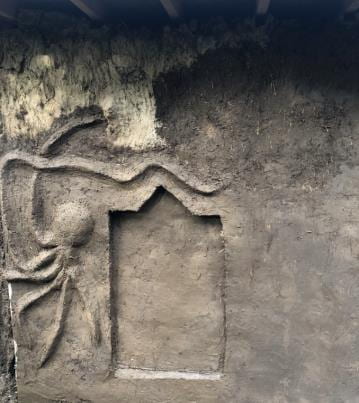
Figure 14: Members of group C sorting out the fine earth for a good mixture.
Figure 15: Fine edges and an experimental design made on the wall of group C.
GROUP D DAY TWO: More mixtures made and applied to make everything nice and stable. The unique thing made today was an arc-shaped edge to beautify the wall and serve as an experiment for the members.
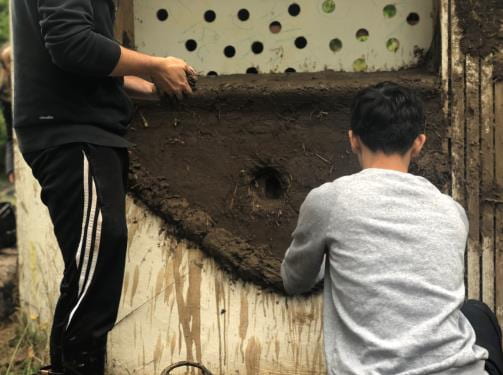

Figure 20: The arc-shaped edge as an experiment.
Figure 21: Window opening completely done.
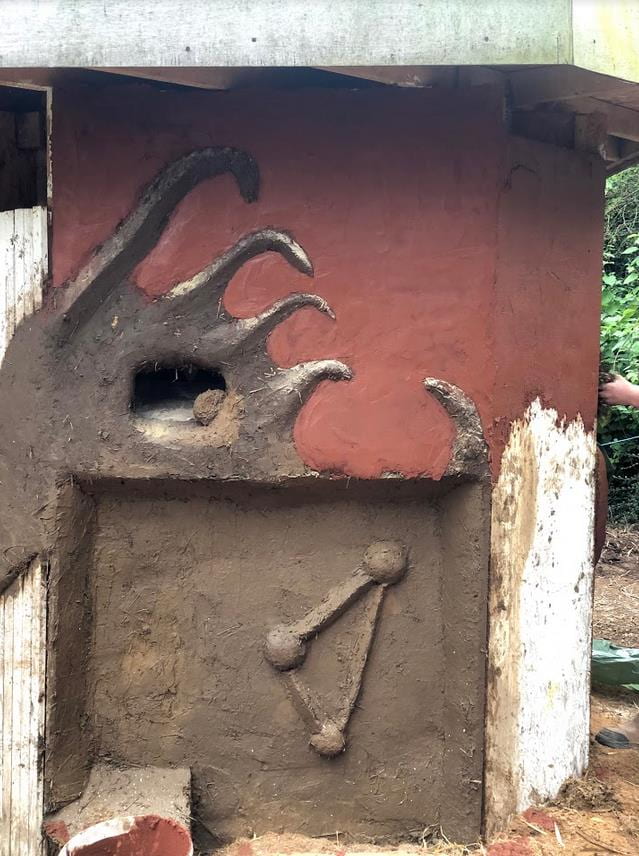
GROUP E DAY TWO: This group had a few issues to sort out. The massive hole stacked with mud bricks started shifting because of the weight on the bottom bricks. To solve this, they used a timber strand diagonally to support the bricks. On the left side of the hole, the mud bricks did not completely stick to the wall because there was not enough water to help it stuck. More water was added today and a little bit of stiff mixture to stabilize it. They smoothed everything and made the edges look great. In addition, they made an arch to make everything look really good.
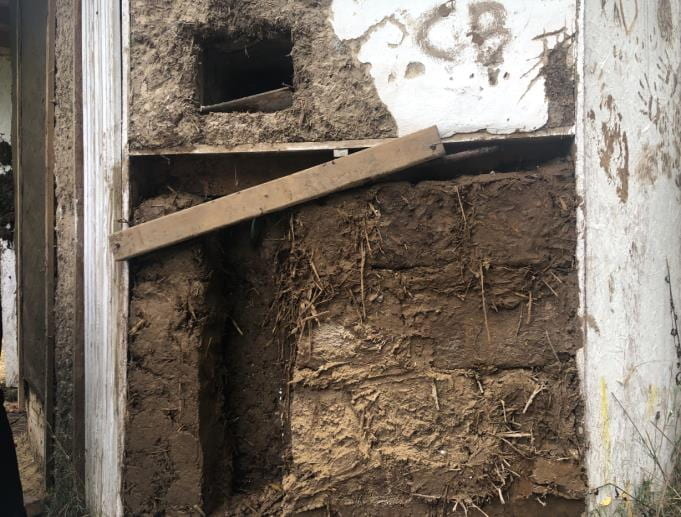


Figure 27: The timber strand positioned diagonally to help support the mud brick.
Figure 28: Adding a chunk of the mixture to the whole to stabilize it.
Figure 29: An arch carved by a student.
Figure 30: The whole panel was done by members of group E.
GROUP F DAY TWO: It was quite straightforward for this group as well. It was all about making more mixtures. The only issue they had was the new mixture applied was falling off. So they solved the problem by reducing the thickness of the mixture.

Figure 35: Smoothing the mixture to make it look beautiful.
DAY THREE Thursday 10th October
9-9.30
Buying material in local merchandiser
9.30 -16.00
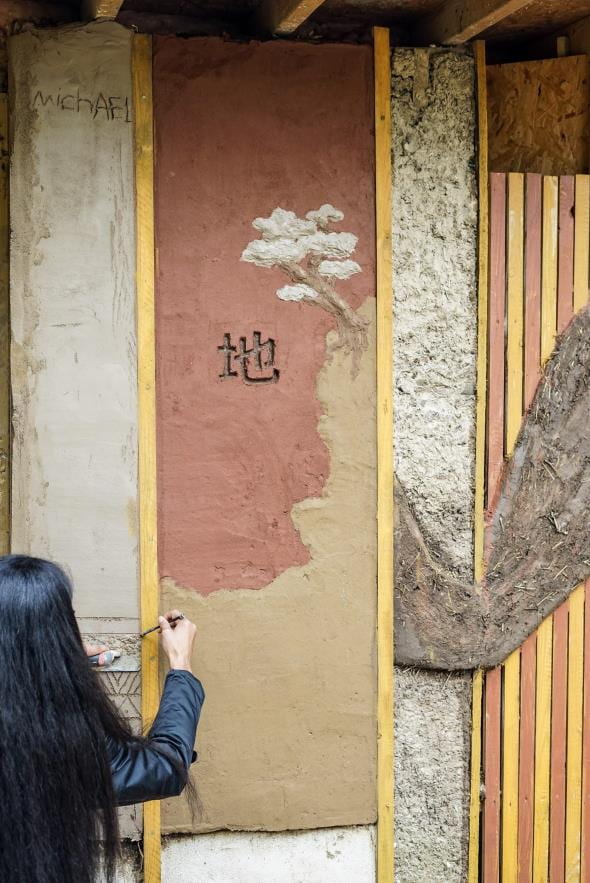
SITE: Creating colour earth plaster Adding pigment
Prepending wheat paste For more weather resistant and durable plaster.
Second layer – undercoat of smooth fine plaster ( undercoat coloured layer)
RESEARCH: Second Research group reaching Rammed Earth architecture
GROUP A DAY THREE: The day was straightforward because there has been progress from the first and second. The applied mixture (straw bale + mud + earth + water) on the panels has partly dried which is enough for a new mixture to be added. The group members applied the red and brown pigment to the semi dry wall.


Figure 5: The semi dry wall from day two.
Figure 6: New layer of mixture added to the wall.
GROUP B DAY THREE: Things were also nice and easy for this group. There has been progress from the first and second day. The applied mixture (strawbale + mud + earth + water) on the panels has partly dried which is enough for a new mixture to be added. The group members applied the red and brown pigment to the semi dry wall.
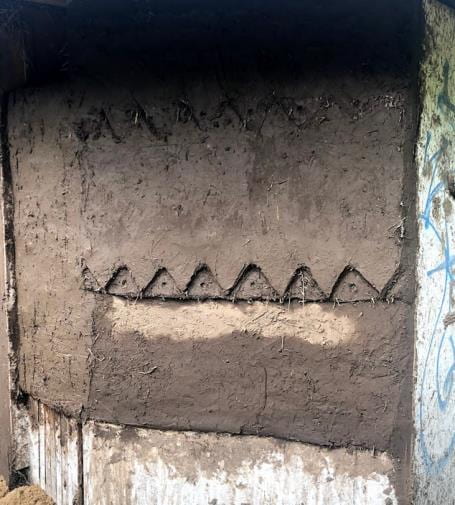

Figure 10: The semi dry wall from day two.
Figure 11: New layer of mixture added to the wall
GROUP C DAY THREE: Nothing new for this group as well. It was just a continuation. The applied mixture (strawbale + mud + earth + water) on the panels has partly dried which is enough for a new mixture to be added. The group members applied the red and brown pigment to the semi dry wall.
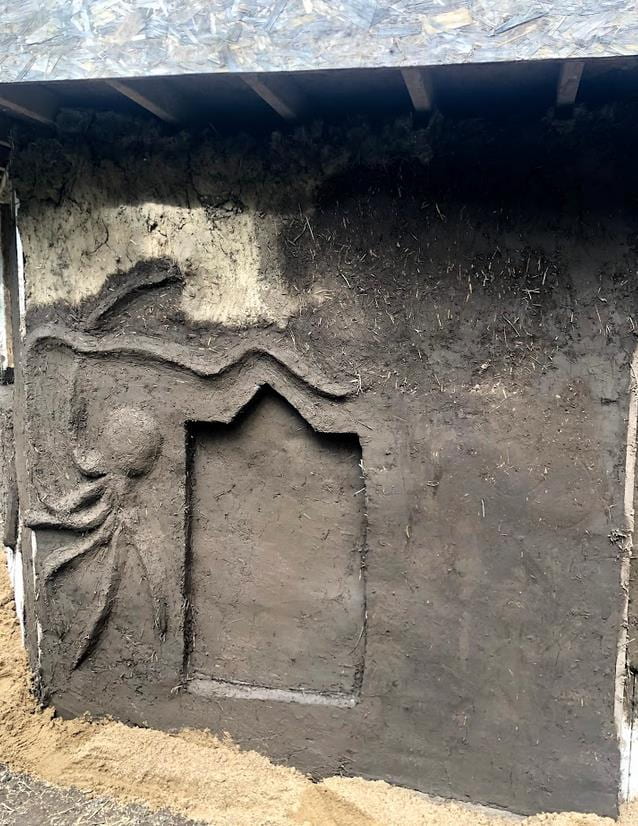
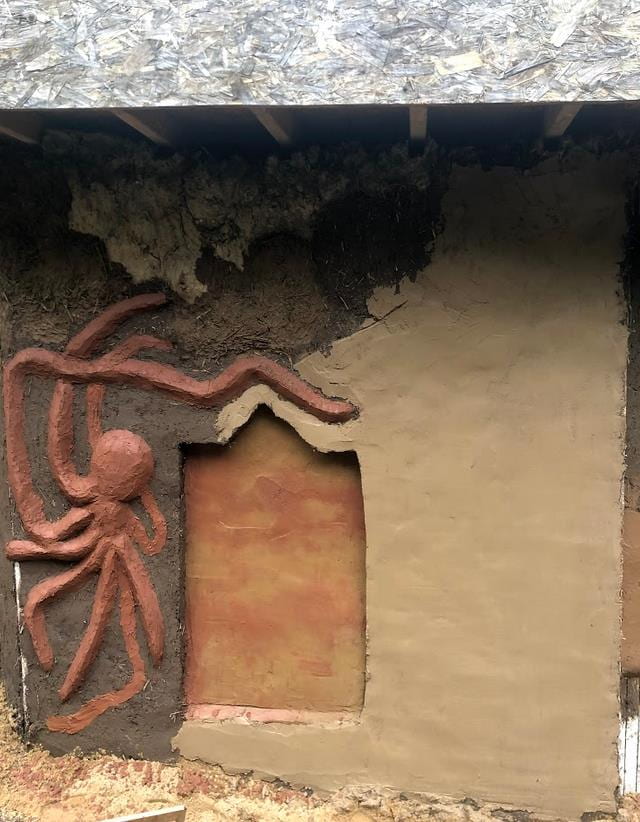
Figure 16: The semi dry wall from day two.
Figure 17: New layer of mixture added to the wall.
GROUP D DAY THREE: Things were also nice and easy for this group. There has been progress from the first and second day. The applied mixture (straw bale + mud + earth + water) on the panels has partly dried which is enough for a new mixture to be added. The group members applied the red and brown pigment to the semi dry wall.
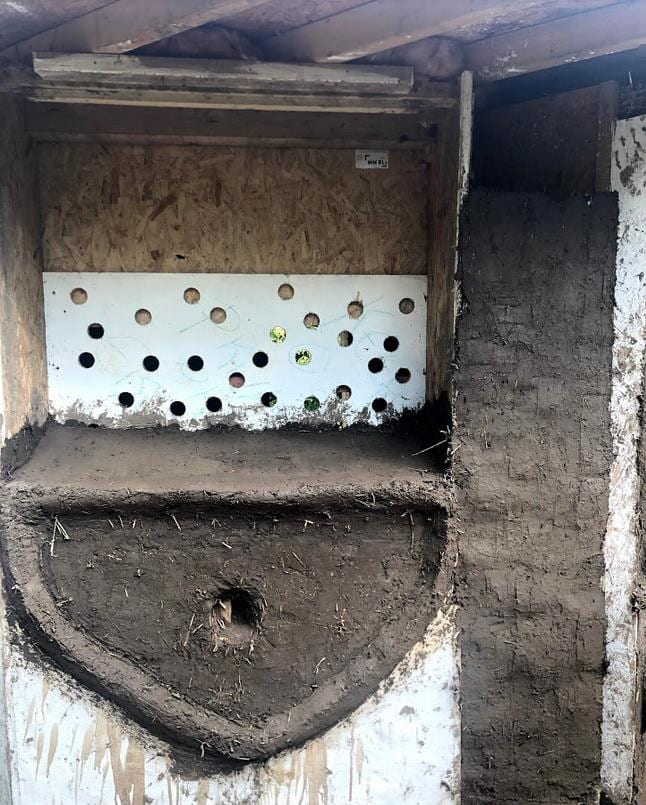
Figure 22: The semi dry wall from day two.
GROUP E DAY THREE: This was the only group that had problem from their day 2 work. The whole filling in the wall collapsed because it was not properly put together. The solution now is to keep things simple. A simple solution for the hole was to remove all the mud bricks because they are not stable. They just applied the mixture (strawbale + mud + earth + water) and smooth it. Other sides of the wall that was partly dry was painted with the red pigment mixture.
GROUP F DAY THREE: Things were also nice and easy for this group. There has been progress from the first and second day. The applied mixture (strawbale + mud + earth + water) on the panels has partly dried which is enough for a new mixture to be added. The group members applied the red and brown pigment to the semi dry wall.

DAY FOUR Friday 11th October
Day and four and five were literally the same for all groups. There were more applications of the coloured mixtures across all groups. Another thing that was given attention was cleaning up the edges. The smoothness of the edges is key to everything because it makes the work look nicer and cleaner.

FRIDAY
9.30-12.30
- SITE: Third Layer – top coat of smooth fine plaster ( top coloured layer)
- Repairing the damages of wall with tool place during the construction.
- RESEARCH : Third Research group reaching recycling material in Architecture
Fourth Research group reaching bamboo architecture and Recycling material in construction
12.30-2.45
- Presentations of all four research groups in Lecture Room
3.00-3.30
- Deborah Whelan lecture “Earth architecture in South Africa and America “
3.30-4.00
- “Presentation of the work at the workshop (by Dominic Zbigniew Niewiadomski “
4.00
- Competition ceremony
DAY 5 Saturday 12 October
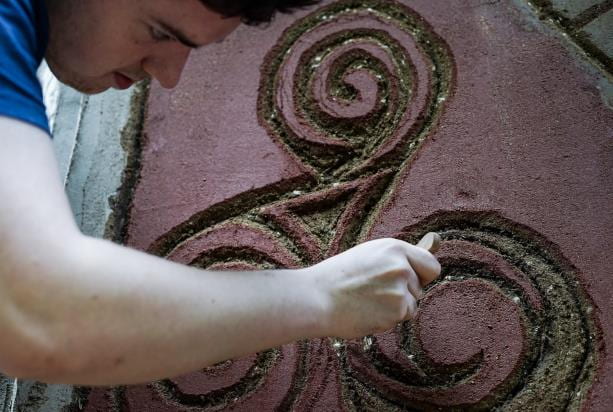
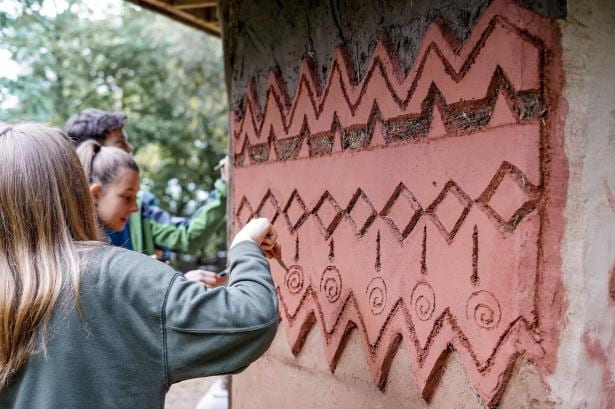
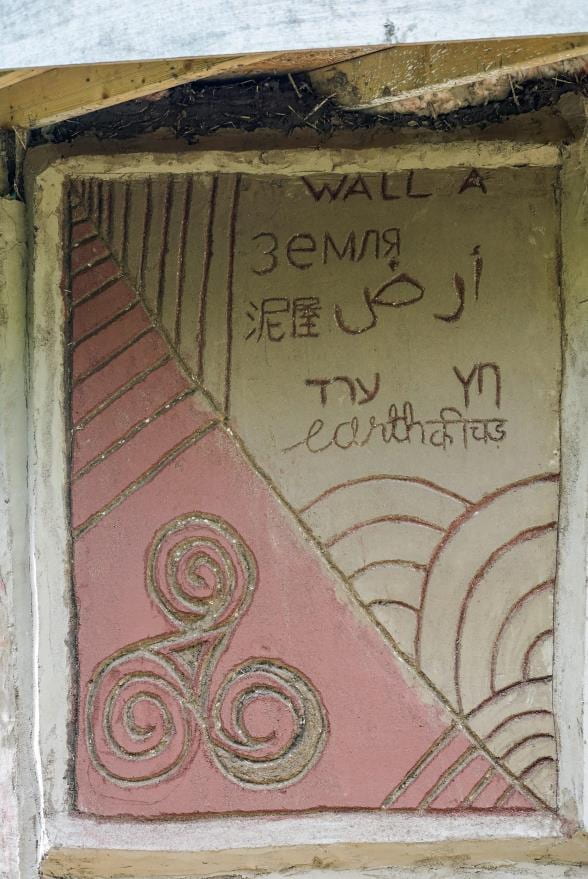
On day five, the coloured mixture that was applied on the day was semi dry and ready for carving. Different groups have different designs/patterns of what they wanted to carve. Carving on the walls were done on the final day.
- Carving
- Final touches
- Green roof preparation
- Cleaning the site
- enjoying THE BEAUTY OF earth architecture
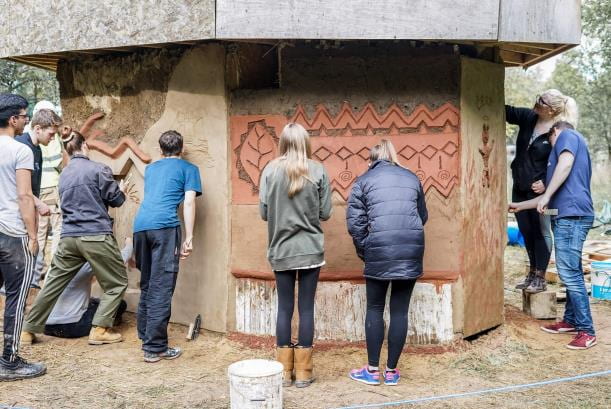
Overall the workshop has been a very good practical work across all years that participated. It was fair to say it was a successful one. Students learnt a lot about the theory of earth/natural architecture and also the practical aspect of it. The workshop also improved communication between students of architecture learning several ideas from one another.

